3ds Max Viewport Settings for AI Rendering
How to set up your 3ds Max viewport so a single screenshot renders cleanly in FurniMesh — the visual style, lighting and configuration that give the best photorealistic result.
FurniMesh renders straight from a screenshot of your 3ds Max viewport — no export, no render engine. Because the screenshot is the input, the cleaner and clearer your viewport looks, the better the photorealistic result. The AI keeps your geometry exactly as you built it and adds the lighting and materials; a tidy, evenly-lit capture gives it the clearest starting point.
This short guide shows the viewport settings we recommend before you take that screenshot. It takes about a minute to set up once.
1. Open the visual style menu
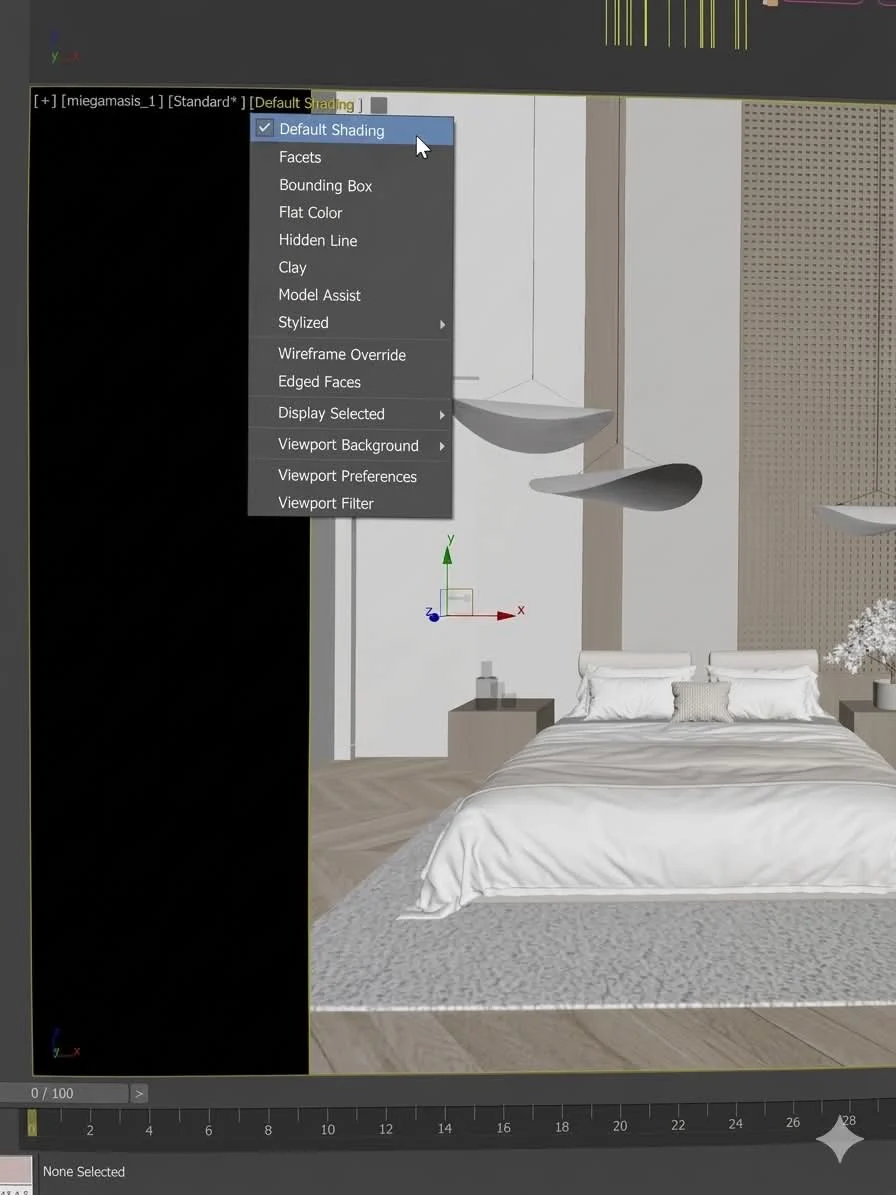
In the top-left corner of any viewport you'll see the shading label — it usually reads [ Default Shading ]. Click it to open the visual style menu.
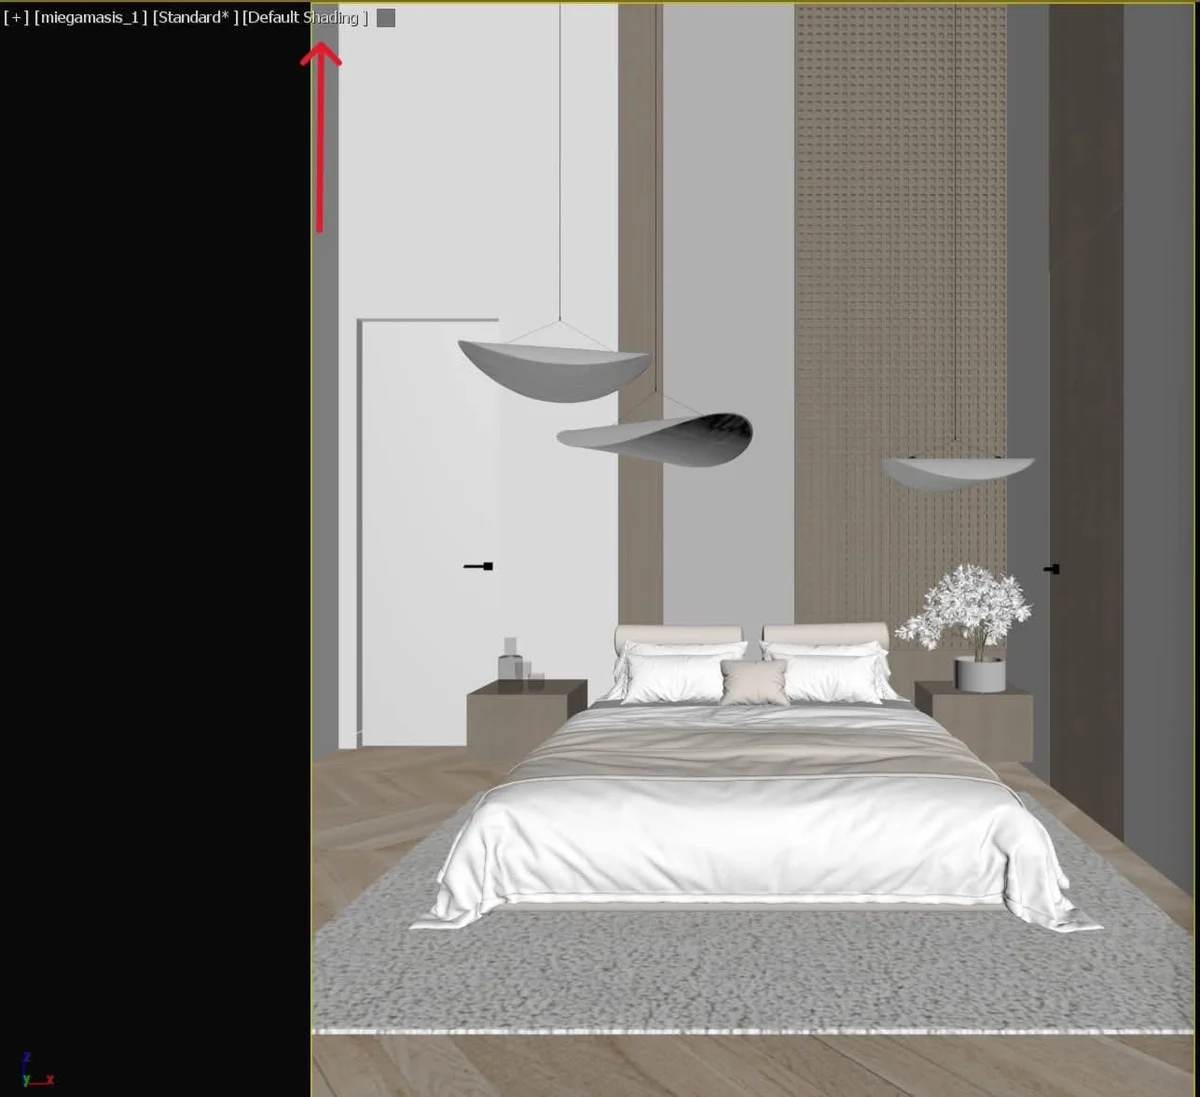
This menu controls how the viewport is drawn. The default works, but a cleaner style gives FurniMesh crisper edges to lock onto.
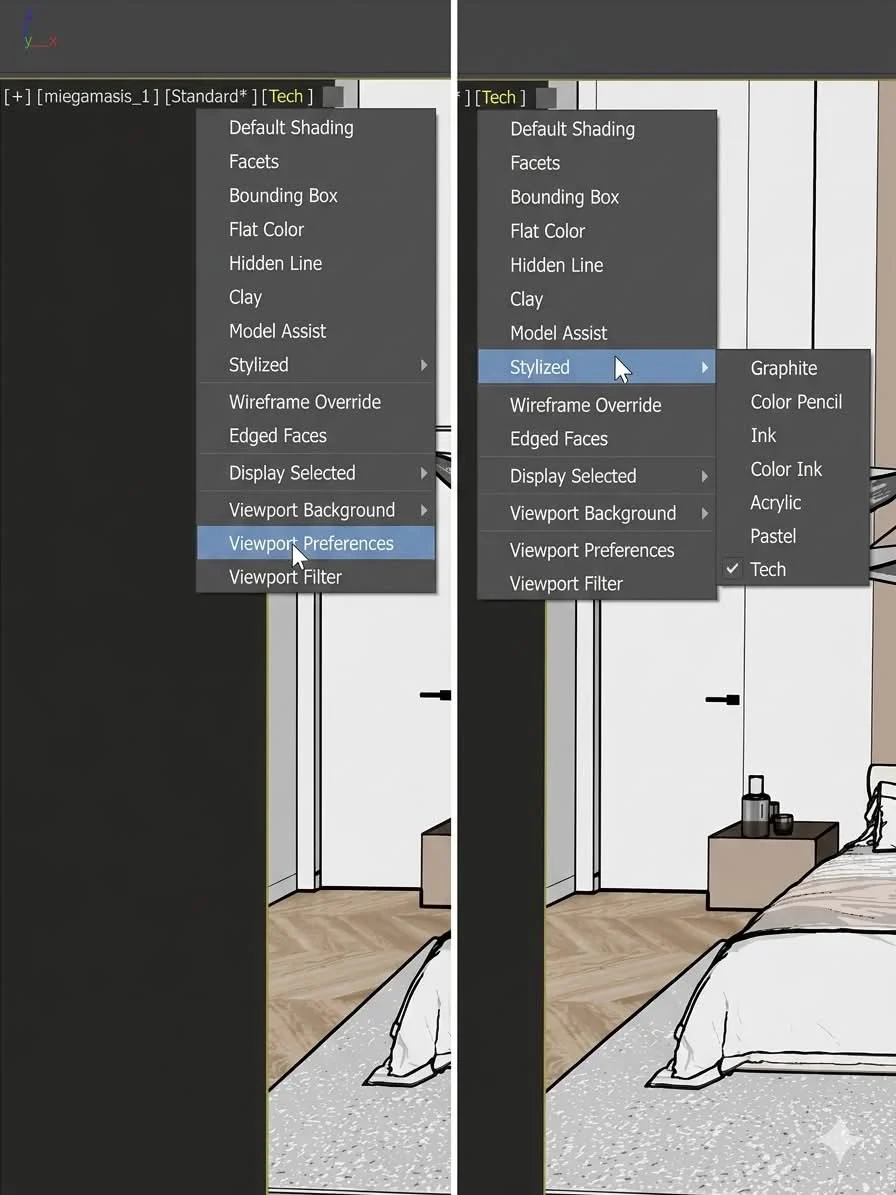
2. Switch to a clean style — Stylized → Tech
Hover Stylized and choose Tech. This draws your scene with clean outlines and flat, even surfaces — exactly the kind of clear, unambiguous image the AI reads best. Your walls, proportions and layout are untouched; only the on-screen drawing style changes.
The viewport now shows the Tech style. Notice how every edge is crisp and the surfaces read clearly — that clarity is what lets FurniMesh preserve your structure precisely while adding realistic light and materials.
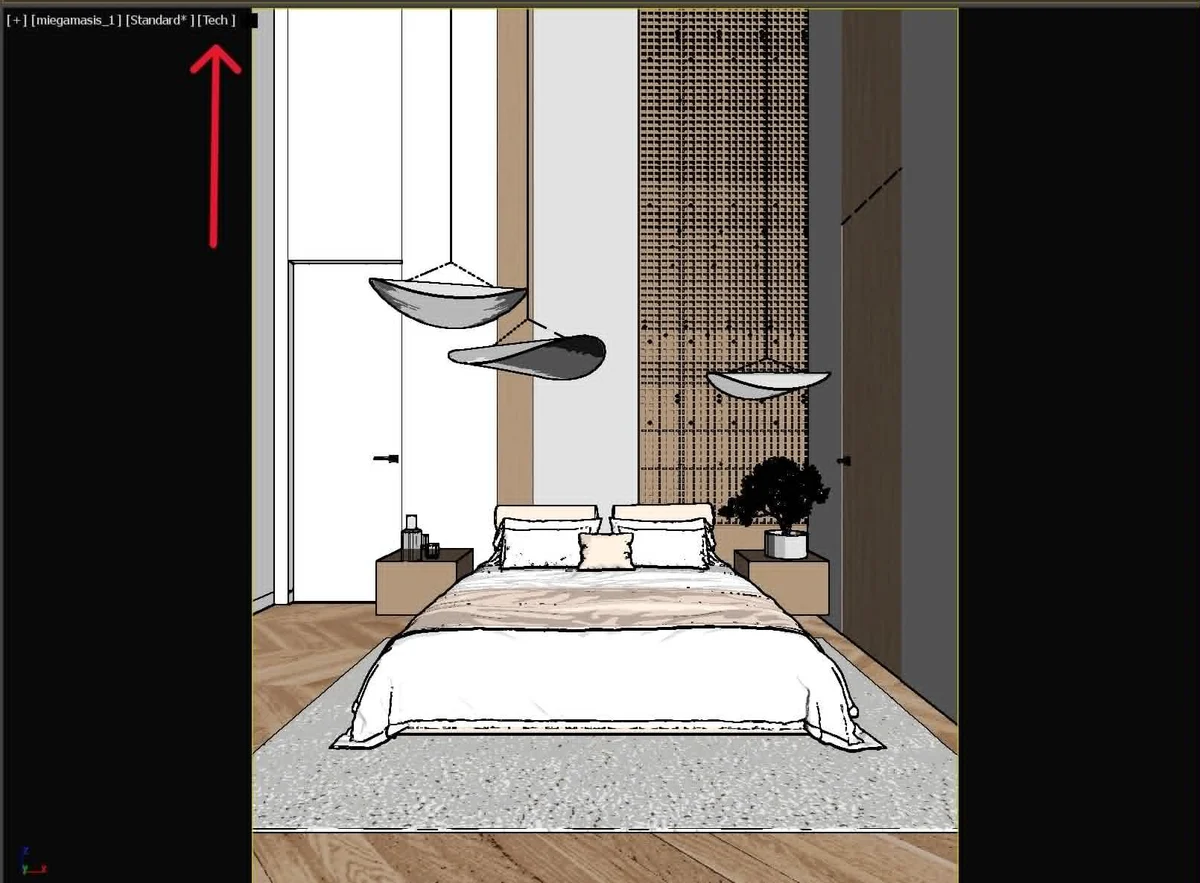
Why Tech? A clean, high-contrast capture removes the ambiguity of soft default shading. The AI never has to guess where an edge or a wall is, so your geometry comes through accurately. Default Shading also works — Tech just gives the cleanest, most consistent input.
3. Fine-tune the viewport configuration
For the most predictable result, open the visual style menu again and choose Viewport Preferences (Viewport Configuration). A few settings make the capture clean and evenly lit:
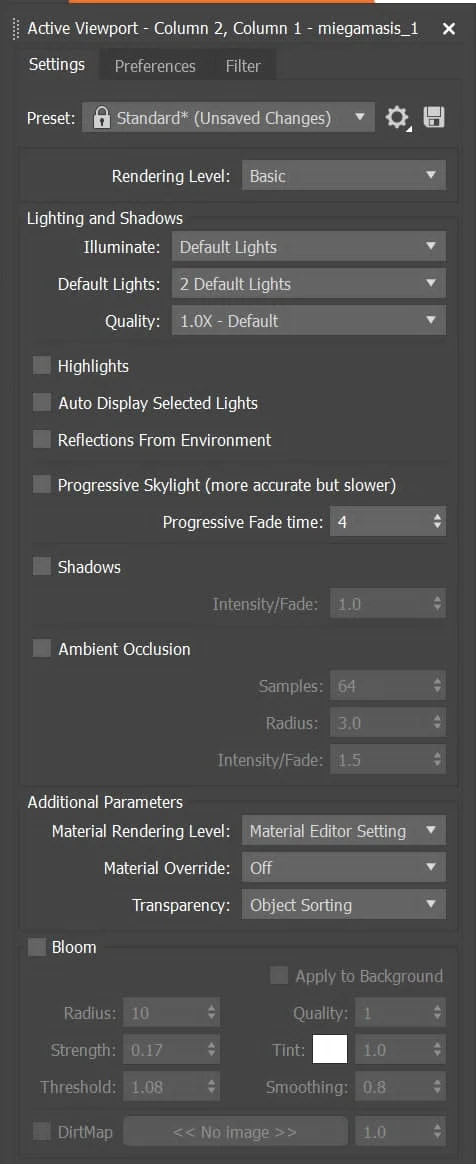
- Lighting: keep Default Lights → 2 Default Lights at Quality 1.0x. Even, neutral light lets FurniMesh add its own realistic lighting instead of fighting yours.
- Turn off heavy viewport effects: leave Shadows, Ambient Occlusion and Bloom unchecked. Baked-in shadows and glow muddy the capture and compete with the lighting the AI is about to add.
- Material Override: Off — so your real materials and colours are visible in the screenshot.
The goal is a flat, clean, evenly-lit view that shows your design clearly. FurniMesh supplies the drama (light, reflections, depth) on top.
4. Take the screenshot
With the Tech style and a clean configuration set, capture the viewport — a normal screenshot of just the viewport area is all you need. A few things to keep out of frame:
- No selection highlights, gizmos or grid lines — deselect everything and hide the home grid (press G) so nothing is drawn over your scene.
- Frame the shot like a photo — orbit to the angle you'd actually present to a client.
- One room or object per shot — render each angle separately; FurniMesh keeps the style consistent across every screenshot in the same session.
Then upload it in the Render Studio and render — you'll get a photorealistic image back in about 30 seconds, with your geometry preserved.
Quick checklist
- Visual style set to Stylized → Tech (clean outlines, flat surfaces)
- 2 Default Lights, Quality 1.0x — even, neutral lighting
- Shadows, Ambient Occlusion and Bloom off
- Material Override off so real colours show
- Nothing selected, grid hidden (G), framed like a photo
- One angle per screenshot — the session keeps them consistent
That's it. The same idea applies to other 3D software too — a clean, evenly-lit viewport screenshot is always the best input. 3ds Max just gives you the Tech style to make it effortless.